ROS2自动驾驶
yolo5自动驾驶
1、重要!更换U盘的操作指引
2、关闭开机自启动大程序
3、Linux基础
4、YoloV5训练集
5、自动驾驶基础调试(代码解析)
6、自动驾驶特调
7、自动驾驶原理
8、PID算法理论
9、阿克曼运动学分析理论
10、建立运动学模型
常用命令
!重要!首次使用
一、原理分析
麦克纳姆轮运动学分析
二、AI大模型
3、AI大模型类型和原理
4、RAG检索增强和模型训练样本
5、具身智能机器人系统架构
6、具身智能玩法核心源码解读
7、配置AI大模型
8、配置API-KEY
三、深度相机
2、颜色标定
10、深度相机的基础使用
11、深度相机伪彩色图像
12、深度相机测距
13、深度相机色块体积测算
14、深度相机颜色跟随
15、深度相机人脸跟随
16、深度相机KCF物体跟随
17、深度相机Mediapipe手势跟随
18、深度相机视觉循迹自动驾驶
19、深度相机边缘检测
四、多模态视觉理解
20、多模态语义理解、指令遵循
21、多模态视觉理解
22、多模态视觉理解+自动追踪
23、多模态视觉理解+视觉跟随
24、多模态视觉理解+视觉巡线
25、多模态视觉理解+深度相机距离问答
26、多模态视觉理解+SLAM导航
27、多模态视觉理解+SLAM导航+视觉巡线
28、意图揣测+多模态视觉理解+SLAM导航+视觉功能
五、雷达
8、雷达基础使用
思岚系列雷达
六、建立地图
9、Gmapping建图
cartographer快速重定位导航
RTAB-Map导航
RTAB-Map建图
slam-toolbox建图
cartographer建图
Navigation2多点导航避障
Navigation2单点导航避障
手机APP建图与导航
七、新机器人自动驾驶与调整
多模态视觉理解+SLAM导航
新机器人自动驾驶
场地摆放及注意事项
启动测试
识别调试
无人驾驶的车道保持
无人驾驶路标检测
无人驾驶红绿灯识别
无人驾驶之定点停车
无人驾驶转向决策
无人驾驶之喇叭鸣笛
无人驾驶减速慢行
无人驾驶限速行驶
无人驾驶自主泊车
无人驾驶综合应用
无人驾驶融合AI大模型应用
八、路网规划
路网规划导航简介
构建位姿地图
路网标注
路网规划结合沙盘地图案例
路径重规划
九、模型训练
1、数据采集
2、数据集标注
3、YOLOv11模型训练
4、模型格式转换
十、YOLOV11开发
多机通讯配置
汝城县职业中等专业学校知识库-信息中心朱老师编辑
-
+
首页
三、深度相机
13、深度相机色块体积测算
13、深度相机色块体积测算
## 色块体积测算 ### 1、程序功能说明 程序运行后,通过鼠标点击画面中图像的点,按下空格确定该点距离,来作为测量体积的标准距离,之后框选色块程序会识别所选择色块的形状,并且获取色块的相关数据,测算色块的体积。 ### 2、程序代码参考路径 ``` ~/yahboomcar_ros2_ws/yahboomcar_ws/src/yahboomcar_depth/yahboomcar_depth/Basic/calculate_volume.py ~/yahboomcar_ros2_ws/yahboomcar_ws/src/yahboomcar_depth/yahboomcar_depth/astra_common.py calculate_volume.py ``` 并且根据标定好的距离和色块的中心点计算色块的数据,并且根据所识别到的色块形状,计算色块的体积。 `astra_common.py` 颜色追踪(color_follow类):通过HSV颜色空间识别和追踪特定颜色的物体图像处理工具:包括多图像拼接显示(ManyImgs函数)、形状检测(is_regular_square函数)文件读写功能:用于保存/读取HSV颜色范围 ### 3、程序启动 #### 3.1、启动命令 终端输入, ``` ros2 launch ascamera hp60c.launch.py ros2 run yahboomcar_depth calculate_volume ``` 程序运行之后,鼠标点在要标定物体的标定距离,按下空格即可标定 终端打印标定的坐标和距离  程序启动后,把色块放入标定物体前面。用鼠标在色块内选取一片区域,获取HSV值。  效果图,注意:色块的位置需要大于深度相机的盲区,建议大于0.3米 程序通过HSV值来过滤掉其他颜色,只保留符合HSV值范围内的颜色。程序会识别色块的形状,并且根据色块的中心点计算色块的数据,并且根据所识别到的色块形状,计算色块的体积。(体积不一定很准确这个是测算) 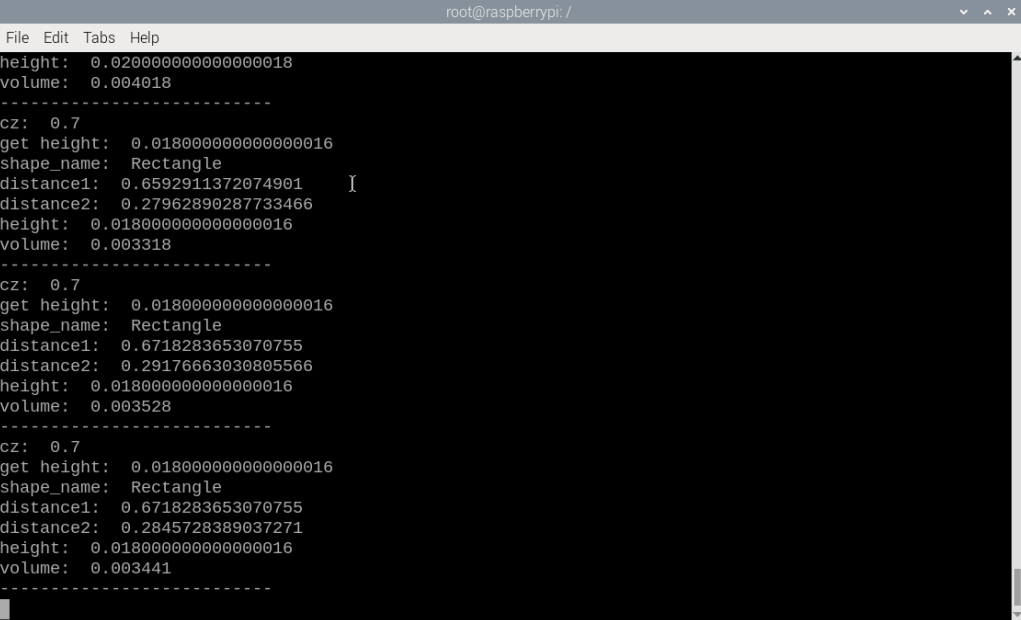 ### 3.2、动态参数调节 如果选取获得颜色的HSV值无法正确的识别出色块形状,则可能需要对HSV值进行微调,终端输入以下命令启动动态参数调节器。 终端输入, `ros2 run rqt_reconfigure rqt_reconfigure` 可以通过修改对应的值修改HSV的值  ☑️ 修改完参数,点击GUI空白处写入参数值。注意只会生效当次启动,永久生效需要将参数修改到源码当中。 4、核心代码 4.1、calculate_volume.py 这个程序主要有以下几个功能: 打开摄像头,获取图像;获取键盘鼠标事件,用于切换模式和取色; 处理图像根据深度距离信息测算色块的体积。可调hsv颜色数值部分核心代码如下: ``` def ComputeVolume(self,color_frame,depth_frame): # 转换彩色图像为OpenCV格式 Convert color images to OpenCV format rgb_image = self.rgb_bridge.imgmsg_to_cv2(color_frame,'bgr8') result_image = np.copy(rgb_image) # 转换深度图像并调整尺寸 Convert depth image and resize depth_image = self.depth_bridge.imgmsg_to_cv2(depth_frame, encoding[1]) frame = cv.resize(depth_image, (640, 480)) depth_image_info = frame.astype(np.float32) # 处理彩色图像得到物体轮廓(具体实现在self.process中)Process the color image to get the object outline (specifically implemented in self.process) action = cv.waitKey(10) & 0xFF result_image = cv.resize(result_image, (640, 480)) result_frame, binary= self.process(result_image,action) if self.color.shape_cx!=0 and self.color.shape_cy!=0: #矩形/圆柱体处理 Rectangle/cylinder processing if self.color.shape_name == "Rectangle" or self.color.shape_name == "Cylinder": # 获取三个角点坐标 Get the coordinates of three corner points x1, y1 = self.get_corner[0], self.get_corner[1] x1 = min(max(0, x1), 640 - 1) y1 = min(max(0, y1), 480 - 1) x1, y1 = int(round(x1)), int(round(y1)) z1 = depth_image_info[y1,x1]/1000 # 获取点1在相机坐标系中的真实位置 Get the real position of point 1 in the camera coordinate system if z1 != 0: c1_pose_T = self.get_pos(x1,y1,z1) else: self.error = True # 同样处理点2和点3 The same process is done for points 2 and 3 x2, y2 = self.get_corner[2], self.get_corner[3] z2 = depth_image_info[y2,x2]/1000 x3, y3 = self.get_corner[4], self.get_corner[5] z3 = depth_image_info[y3,x3]/1000 # 获取中心点深度并计算高度 Get the center point depth and calculate the height cx, cy = self.color.shape_cx, self.color.shape_cy cz = depth_image_info[cy,cx]/1000 if cz != 0: self.center_pose_T = self.get_pos(cx,cy,cz) self.height = self.center_pose_T[2]*100 # 高度转换为厘米 Convert height to centimeters # 如果没有错误则计算体积 If there are no errors, calculate the volume if not self.error: # 计算点到中心的距离(转换为厘米) Calculate the distance from the point to the center (convert to centimeters) point1 = np.array([c1_pose_T[0], c1_pose_T[1], c1_pose_T[2]]) c_point = np.array([self.center_pose_T[0], self.center_pose_T[1], self.center_pose_T[2]]) r = np.linalg.norm(point1 - c_point)*100 # 计算边到边距离(转换为厘米) Calculate side-to-side distance (convert to centimeters) distance1 = np.linalg.norm(point1 - point3)*100 distance2 = np.linalg.norm(point3 - point2)*100 # 根据形状计算体积 Calculate volume from shape if self.color.shape_name == "Rectangle": volume = distance1 * distance2 * self.height if self.color.shape_name == "Cylinder": volume = math.pi * r * r * self.height # πr²h #立方体处理 Cube processing if self.color.shape_name == "Square": # 获取中心点坐标 Get the center point coordinates cx, cy = self.color.shape_cx, self.color.shape_cy cx, cy = int(round(cx)), int(round(cy)) # 获取中心点深度 Get the center point depth cz = depth_image_info[cy,cx]/1000 if cz != 0: self.center_pose_T = self.get_pos(cx,cy,cz) self.height = self.center_pose_T[2]*100 # 立方体边长Cube side length # 立方体体积(边长³) Volume of a cube (side length³) volume = self.height * self.height * self.height ```
admin
2025年11月30日 15:16
28
转发
收藏文档
上一篇
下一篇
手机扫码
复制链接
手机扫一扫转发分享
复制链接
分享
链接
类型
密码
更新密码
有效期
Markdown文件
Word文件
PDF文档
PDF文档(打印)
AI